本教程内容自始至终都是免费使用,如果有你发现有人盗取牟利,请拒绝并不遗余力地在一切平台举报投诉他!
2022年08月01日更新: 此 IDEA 激活破解教程适用于2021.3以后的所有版本,在版本PhpStorm-2022.2.3亲测有效
注意:此原理是拦截认证链接,让我们的key顺利认证通过,故无需改动 host 文件
想了解原理的请移步ja-netfilter原理, 看代码移步ja-netfilter
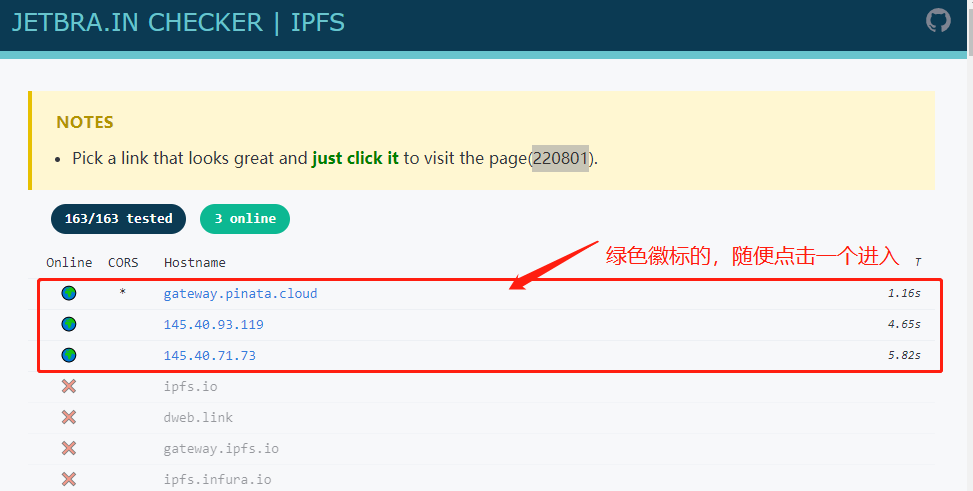
进入大佬提供的导航页面https://3.jetbra.in/,点击绿色徽标的链接进入
进入插件页面
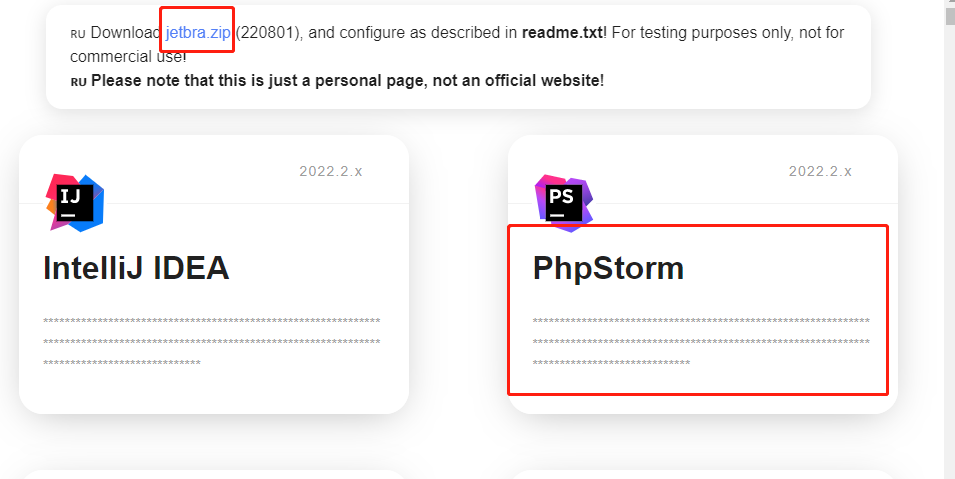
先点击下载
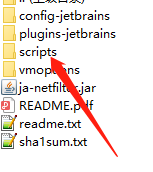
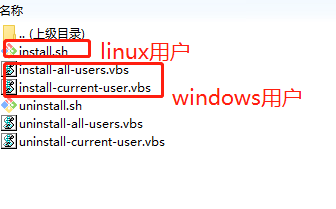
jetbar.zip文件,进入script目录,根据当前系统双击执行脚本(例如windows选择.vbs, linux选择.sh),等待几秒就会出现·done·弹窗表示安装完成(实际上就是向你的phpstorm的vm-options里面将根目录的ja-netfilter.jar等一些参数写入配置中),如果弹出其他错误,根据错误提示修改就可以。
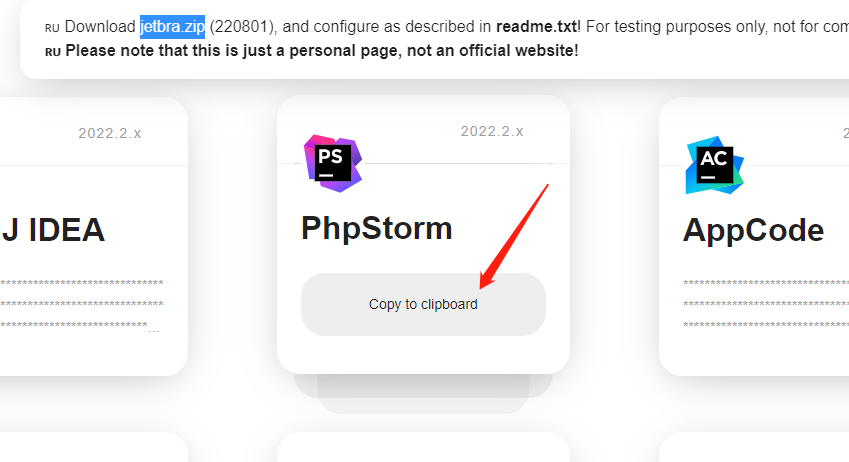
回到插件页面,移动鼠标到phpstrom, 点击
Copy to clipboard(就是复制到剪贴板的意思),就将我们要认证的key复制好了。
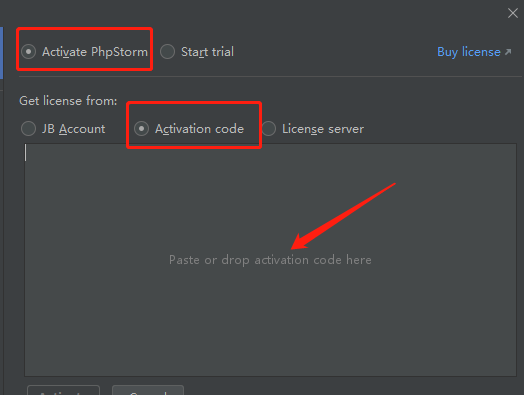
打开你的phpstorm的激活页面,选择激活码激活,输入你上面复制的key, 点击确定。
tips: 这个插件作用不止于此,更多东西需要你发挥想象。
本项目只做个人学习研究之用,不得用于商业用途!
若资金允许,请点击链接购买正版,谢谢合作!
学生凭学生证可免费申请正版授权!
创业公司可5折购买正版授权!
本教程涉及到软件和技术均来自网络,如果侵权请联系作者删除!